 |
Orange Windows - get it? A little like the Orange Peel block
and a little like a faux Cathedral Windows block? I'm so funny! |
We are starting the second half of the Skill Builder Sampler! This month it is all about applique. Applique is the process of sewing a small piece of fabric onto a larger piece. We could spend a whole year on applique but we will touch on the basics and then you can continue to practice and improve your technique.
This block is made with raw edge applique - that is the edges of the fabric are not turned under when they are sewn onto the background fabric. My husband insists that raw edge applique is cheating, but it is a simple, fast and effective method and even he said the finished block was "really nice - one of my favorites." :)
When I first heard about raw edge applique I was worried that there would be a lot of fraying.
But if the pieces are attached with a product like Heat n Bond the fibers of the fabric are almost glued together and the chances of fraying are almost zero.
............
Edited (8/15): The Skill Builder Sampler will is available for purchase in book form! It has been renamed "You Can Quilt! Building Skills for Beginners" but covers the same skills with the easy, medium and challenging blocks and is a million times better than the original quilt along. It is perfect for the beginning quilter or the experienced quilter who wants to branch out and learn new skills. Find more information and order a signed copy in my Etsy shop or order on Amazon .
.
..............
To make this block you will need:
- A Compass
- Card stock
- Heat n Bond
- 12.5 inch square of background fabric
- Fabric Scraps
First, make a template for the petals.
Cut a 3 inch square piece of card stock. I just used my rotary cutter and ruler.
Next, place the point of the compass in the corner of the card stock and open it until the pencil touches the adjoining corner. Draw an arc from corner to corner.
Place the point of the compass on the opposite corner and draw another arc from corner to corner. Cut out the template.
Next get out your Heat n Bond. Heat n Bond has paper on one side and sticky on the other.
Trace the petal shape on the paper side of the Heat n Bond 16 times.
Rough cut around each petal and iron onto the back of your petal fabric following the directions on the package.
Cut out all the petals just
inside the line drawn on the paper.
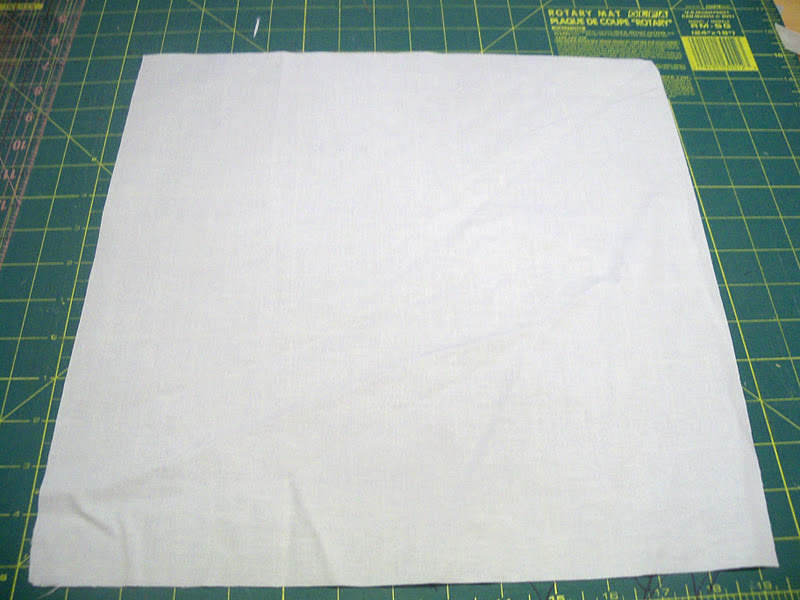
Cut the background fabric into a 12.5 inch square.
Fold in half along the diagonal and iron.
Fold in half again and iron.
There should be visible folds from corner to corner. These will serve as a guide for positioning the petals.
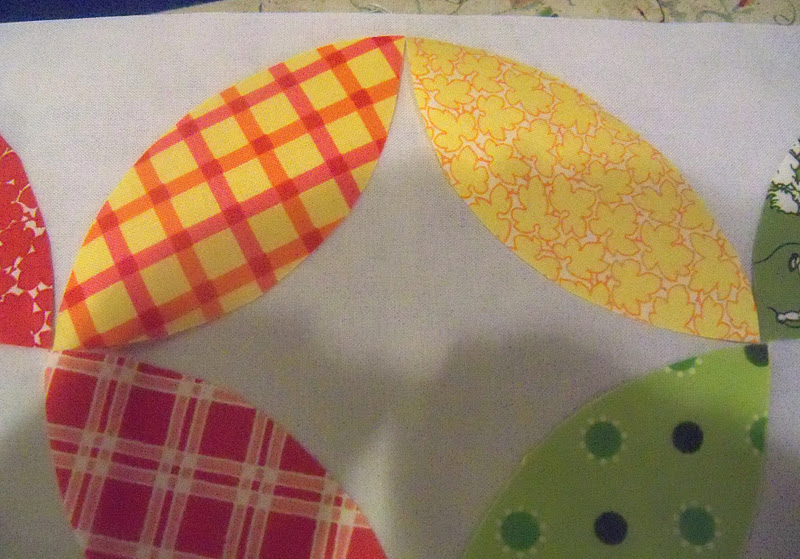
First, lay out the petals and decide on an arrangement that suits you. It might help to take a picture to refer to .
Remove the petals. Find the center of the fabric and place a petal with one point at the center and the other point along the diagonal line. Press just the center to keep it in place. (If you need to adjust a petal you can pull it off and reattach it - they will lose some of their adhesion and leave a bit of a residue - but if you are putting another petal in the same place it shouldn't be a big deal. But I definitely wouldn't make a habit of it.)
Attach all of the petals along one diagonal.
The corner petals point should be a quarter of an inch from the sides of the background fabric.
Attach the petals along the second diagonal.
Then add the side petals. Their lower points should touch the points of the petals on the diagonals and their top points should touch each other 1/4 inch from the edge of the background fabric.
Repeat for all four sides. When you have all of the petals tacked down, give them a good iron - make sure all of the points are good and stuck.
Now it is time to stitch around the edges. But before we get started, change your thread to a color that blends well with most of your petals - unless you want the contrast. You can use a zig zag or button hole stitch to finish the edge. I used a zig zag. Play around with the stitch length and width on a scrap piece of fabric until you are satisfied. I wanted my zigs and zags fairly wide and close together and set my stitch length to .5 and width to 3.5.
If you haven't stitched along the edge of anything before, take a scrap of fabric, place it on top of another scrap and stitch along the edge of it. One side of the zig should go barely off of the scrap petal and onto the background fabric. Play around until you have the hang of it.
Start sewing around the petals at one corner of the block. Don't worry about back stitching, because we will end at the same spot and back stitch then. Start stitching along the top edge of the petal.
When your reach the point, continue on stitching the under side of the next petal in line. When you reach it's point (the center of the block) continue stitching on the upper side of the 3rd petal in line and so on.
When you reach the corner, stop with the needle down and turn around. Stitch along the opposite sides of the petals until you reach the starting point. Back stitch just a few stitches. Repeat for the petals on the other diagonal.
Now stitch down the petals around the edges. There is a simple way to sew down the rest of the petals without having stop once. Just follow the arrows in my high tech diagram. ;) Start sewing at the star and follow the black arrows all the way around the block going over and under the petals. When you reach the edges of the fabric you will need to stop with the needle down and rotate in place a bit to start on the next petal. When you reach the beginning star, stop with the needle down, rotate and start stitching on the underside of the first petal. Follow the white arrows around the block. Back stitch a few stitches when you reach the beginning again.
And you did it! I really enjoyed making this block. Wouldn't it be fun to make a bunch and join them together into a large quilt?
I am leaving for
Abu Dhabi today (crazy!!) to visit my BFF and will be gone for a week and a half, so I will not be posting a block next week. I was hoping to have the tutorial written up before I left, but that just didn't happen. So take a week off, do your Christmas shopping and the next Skill Builder Sampler block will be on the 17th. I'll bring back pictures of my trip too.


Thanks for this tutorial. I always do needle turn and I found it so difficult to applique the points, it's always a mess!!!! maybe you could help me in another tutorial????
ReplyDeleteGreetings from France
This is lovely! Thanks Leila - hope you have a wonderful holiday, and enjoy the time off away from your computer :-)
ReplyDeleteI love this one!!!! It's so pretty!
ReplyDeleteOh, and have a great trip!!
ReplyDeleteCurious if you had any shrinkage in the final block size? Safe travels!
ReplyDeleteOoo, this looks easy and fun! My red and white pallette might make this harder to choose the fabrics.... Your block is really pretty--love all the colors!
ReplyDeleteI love this! I'm putting it on my "to do" list. I can definitely see a whole quite out of this block. Thanks for the tutorial.
ReplyDeleteSome answers:
ReplyDeleteI think red and white will be great! A solid white background with all of your pretty prints on it? Perfect!
We will be working on points in block 21. I have a hard time with them too.
No, I didn't have any shrinkage, but you can always make the block bigger and then trim it to size. Just be sure your petals don't go beyond the 12 inch mark.
Have a great holiday!
ReplyDeletethanks for the tutorial! i used it to make an all-scraps baby quilt :)
ReplyDeletehttp://semiorganizedchaos.wordpress.com/2011/12/03/scrappy-orange-windows/
I've just finished this block (except for the machine stitching) and have really enjoyed doing it. It didn't take me as long as I thought it would, and I'm so glad you are so meticulous with your tutorials, Leila. If you hadn't spelled out each step I would have been tempted to make short cuts, which I realised as I went along, would have been a disaster.
ReplyDeleteI am finally ALL caught up on the challenge!! Just finished this one tonight. It was so fun to do. Never thought that I would love to applique, but I guess... you never know until you try! This is the first time I have used specialty stitches. I have always loved the feather stitch and got a chance to do it myself finally. Even my hubby was impressed! :)
ReplyDeleteI love this block! I made it during nap time today and it turned out great. I have a lotof experience with this type of applique but never tried a pattern like this before, it was fun.
ReplyDeleteI will make this block; it is really nice. Thank you for sharing your tutorial. Have fun visiting your BFF.
ReplyDeleteQuick, easy, and super cute! Do you mind if I use one or two images on a blog post I am writing for my quilt guild? We do a block lottery every month and this month I would like our members to use your tutorial. I will, of course, give you full credit and link directly to your instructions here.
ReplyDeleteThank you so much for this wonderful tutorial, it is just the ticket needed. Phew! Now I can sleep peacefully.
ReplyDeleteI will link to your tut when I post pics, on my blog, of my granddaughter creating a pillow using it. Thank you, again.
Love this! I just finished an Orange peel quilt a la MSQC. I found it very labor intensive and the results were just so so. This method seems so much more user friendly.
ReplyDeleteI just purchased the Accuquilt Baby cutter and the orange peel die ... thinking I would like to do this with black background and jewel tones to look like stained glass. Thanks for your tutorial as it has helped me visualize what I can do with the die when I get the cutter, hopefully today!!!!
ReplyDelete